


May 12 | 8 min read
Introducing dynamic tenant creation
How to add a tenant and generate corresponding API tokens
Introduction: multi-tenancy and the authentication proof challenge
An Opstrace instance supports multiple secured tenants. The 'tenant' primitive—provided by the underlying projects Cortex and Loki—can be used to isolate data, dashboards, and API endpoints by team, environment, or by anything else important to you. Sometimes this isolation is used to address security concerns, but more generally, it helps keep things well-organized: after all, separation of concerns is a valuable best practice to keep in mind.
So, when installing an Opstrace instance in your account, you have to specify which tenants you want to provision. You list them by name in the cluster configuration document.
But what if, after that initial installation, you decide you would like to add another tenant? Until recently, you would not have a tenant complete with a new public API authentication token.
One challenge associated with that task is creating API authentication tokens for that new tenant (as our APIs are secure by default). Let's take this slow.
For each tenant, an Opstrace instance exposes certain API endpoints, with the
tenant's name used in the corresponding DNS names. For example, the Cortex API
for a tenant with the name prod in an Opstrace instance with the name
nice-org is exposed securely via https://cortex.prod.nice-org.opstrace.io.
To use that API endpoint, a client has to provide authentication proof: a tenant-specific API token, signed by a private key whose corresponding public key needs to be trusted by the Opstrace instance.
In the past few weeks, we added functionality to the Opstrace CLI for said key management and token creation. We also started covering the complete user experience flow for tenant creation and corresponding token creation in our continuous integration. With this work, we can confidently announce the capability of dynamic tenant addition to a running Opstrace instance.
This blog post primarily is a tutorial, showing:
- How to generate a new key pair with the Opstrace CLI.
- How to generate an API token for a specific tenant using the private key of said key pair (also with the help of the Opstrace CLI).
- How to add the public key of said key pair to a running Opstrace cluster. 4. How to — after all — add a tenant to a running Opstrace instance via the UI: we will wait for the corresponding API endpoints to become available, and then use the tenant-specific Cortex HTTP API using the previously generated API token.
Along the way, some of the core concepts are explained.
Step-by-step guide
Let's add a new tenant (name: newtenant) to a running Opstrace instance. The
name of the existing (running) Opstrace instance in this guide is showdown.
1) Create a new RSA key pair
Create a new RSA key pair and store it in a file with this command:
./opstrace ta-create-keypair ./custom-keypair.pem
Note: The ta- prefix represents the idea of "tenant API authentication." All
ta-* commands offered by the Opstrace CLI are new and should be thought of as
experimental (command names and signatures are subject to potentially big
changes in the future).
After running this command, you have a local file ./custom-keypair.pem in your
file system, with locked-down file permissions. It is important to understand
that this file contains a secret, the private key.
2) Create an authentication token
The following command creates a new authentication token, signed with the private key of the key pair generated in the first step:
./opstrace ta-create-token showdown newtenant custom-keypair.pem > token-showdown-newtenant.jwt
The token (emitted via stdout and captured in the file
token-showdown-newtenant.jwt) is a standards-compliant JSON Web Token (JWT),
implementing Opstrace-specific conventions:
- in the JWT header, it encodes an ID of the public key via which it can be cryptographically validated.
- in the JWT payload section, it encodes the name of the associated tenant.
For this token to become useful, an Opstrace instance needs to be configured with the public key corresponding to the private key that was used to sign the token. Let's do that.
3) Add the public key to a running Opstrace instance
You can think of this step as adding a new trust anchor to the trust store of a running Opstrace instance. Just like with X.509 certificates, trusting a public key means that authentication proof signed with the correspond private key is accepted (reminder: in public-key cryptography, verification of authentication proof only ever needs the non-sensitive public key material and not the private key data—that's the beauty).
So, to make an existing Opstrace instance trust the authentication token generated in the previous step, we have to put the public key into the instance:
./opstrace ta-pubkeys-add aws showdown custom-keypair.pem
4) Create a new tenant with the UI
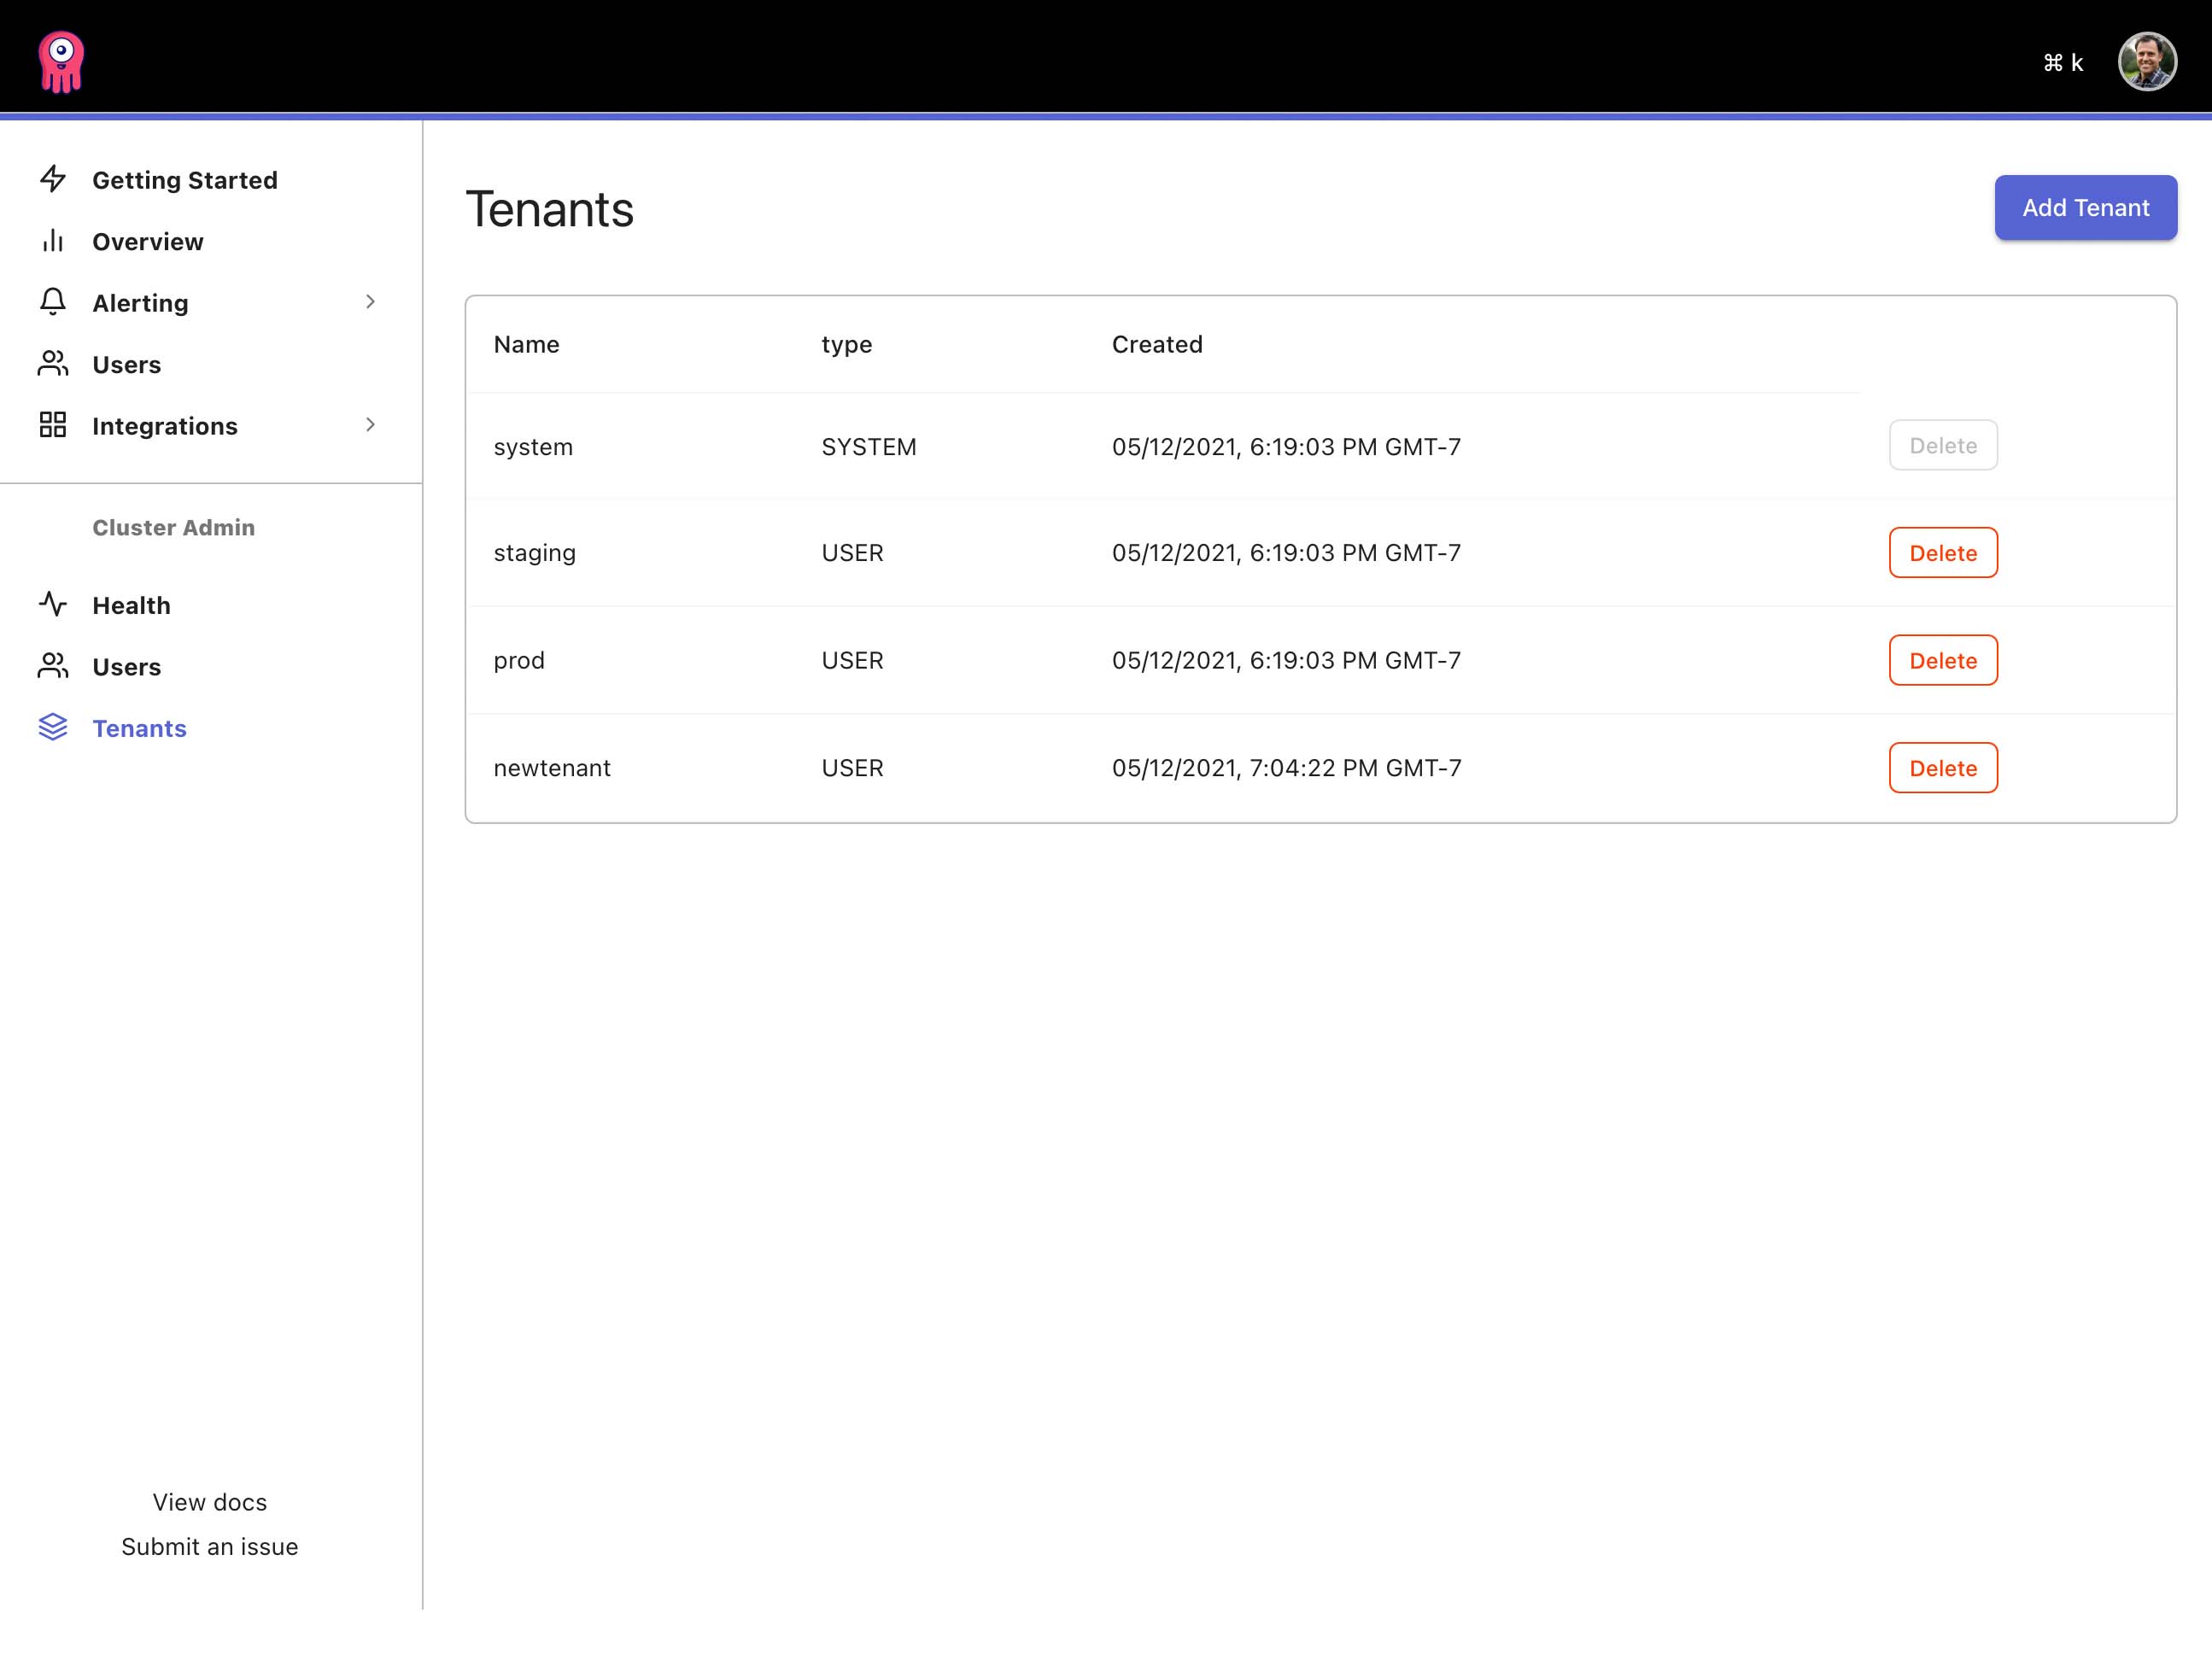
Visit https://showdown.opstrace.io/cluster/tenants and press the Add Tenant
button:


Type the name of the new tenant (here: newtenant)

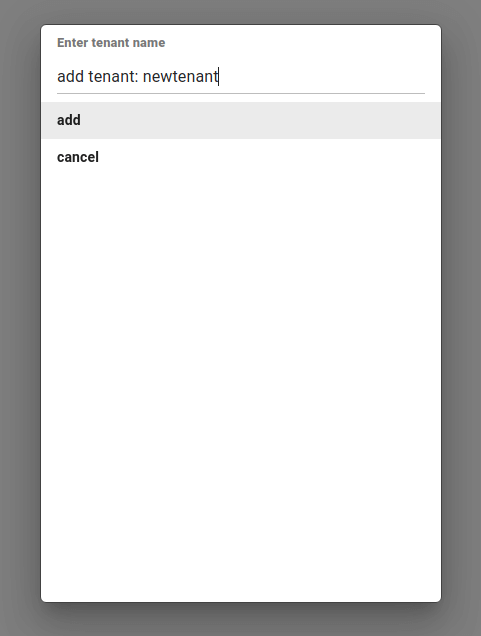
Warning: we do not yet do strict tenant name validation. To make sure things
work, please keep the name lower case [a-z] for now.
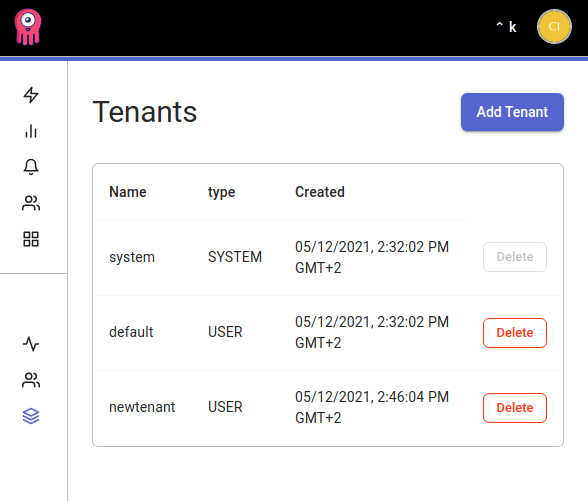
After adding the tenant, the overview should look like this:

5) Wait for the corresponding API endpoints to become available
After creating the new tenant via the UI, the Opstrace controller running in the Opstrace instance starts a number of new components and initiates a DNS reconfiguration.
Effectively, we're now waiting for the DNS name
cortex.newtenant.showdown.opstrace.io to become available.
We can probe that from our point of view with curl:
curl https://cortex.newtenant.showdown.opstrace.io/api/v1/labels
It should take about 5 minutes for DNS name resolution errors to disappear. Next
up, expect an HTTP response with status code 401, showing the error message
Authorization header missing in the response body.
6) Test using the API, in an authenticated fashion
Let's add said header and make an example API call against the Cortex API for the new tenant:
$ curl -vH "Authorization: Bearer $(cat token-showdown-newtenant.jwt)" \https://cortex.newtenant.showdown.opstrace.io/api/v1/labels...< HTTP/2 200...{"status":"success","data":[]}
Getting a 200 response (and not a 401 response) means: the authentication
token provided in the request was accepted. The so-called authenticator in the
Opstrace instance extracted the public key ID from the token's header section,
found a corresponding public key in its trust store (think: "set of public keys
that I am configured to trust"), and then performed a cryptographic verification
using that public key. It also confirmed that the tenant name encoded in the
token matches the tenant associated with the API endpoint.
You could now go ahead and take this authentication token and configure serious
API clients with it, such as a Prometheus instance to be able to remote_write
to https://cortex.newtenant.showdown.opstrace.io/api/v1/push.
Additional notes about token revocation and private key material
For now, authentication tokens created via the process shown here are
practically never expiring. In view of that, a good way to invalidate (revoke)
tokens is to remove the corresponding public key (trust anchor) from an Opstrace
instance. That can be done with the opstrace ta-pubkeys-remove ... command.
We decided deliberately for private key material to not enter the Opstrace instance. That means that the Opstrace instance itself cannot issue new authentication tokens. But who can? The owner of the private key.
After stepping through this guide, you have an important piece of information sitting on the disk of your local machine: the private key which can be used to craft authentication tokens that will be trusted by the Opstrace instance that holds the corresponding public key.
Having access to this key and having it available on your local machine might potentially imply a lot of responsibility; depending on the security context of the Opstrace instance that now trusts matching tokens.
So, what to do with the private key? In serious environments, you maybe want to pick one of the following two options:
- Delete the private key. Immediately and safely. That means: only the single authentication token derived from it so far is actually trusted by the Opstrace instance, and other tokens can never be generated anymore.
- Put the private key somewhere real safe. For example, put it into a password database. Or store it in an appropriate secret store. Annotate it with what its purpose is and how to use it.
After all, managing secrets is a task that needs to be taken seriously by the humans interacting with the secrets; it should always be subject to some kind of organization-dependent process.
Conclusion
An Opstrace instance supports multiple secured tenants to enable logical separation of concerns (for example, tenants for teams or environments). We leverage the generous primitives provided by Cortex and Loki to now dynamically provision tenants in a running Opstrace instance. Because the APIs exposed for each tenant are secure by default, the process requires careful orchestration and consideration. Hopefully, this blog post has detailed this process and its nuances so that you can safely provision new tenants as needed.
Security and privacy are core to what we do. We will continue to invest in these areas and hope you will join us along the way.